


My husband always scolds me when I tell whoever compliments my outfit, shoes, purse, whatever, that I got the item at Target on the clearance rack. He thinks it is very strange that I don’t just say, “Thanks,” but instead have to announce that I’m super cheap.
I call it thrifty. I love a bargain. My grandmother taught me how to shop to find a deal.
I know that Goodwill has hidden treasures and local thrift stores have them too, and you can haggle there. I know that Dollar General carries the same brand of cleaning supply that I pay $2 more for at Publix. And I learned from my mom that if I have a good picture of something and a little hot glue, I can probably craft it myself and make it look just right.
The baby’s nursery was no different. I had big Pinterest dreams for a world traveler theme, but knew I needed to save money, you know, for the actual baby that was on his way.
Here are my tricks for designing an awesome nursery on a budget.
1. Dream big, and then apply it practically.
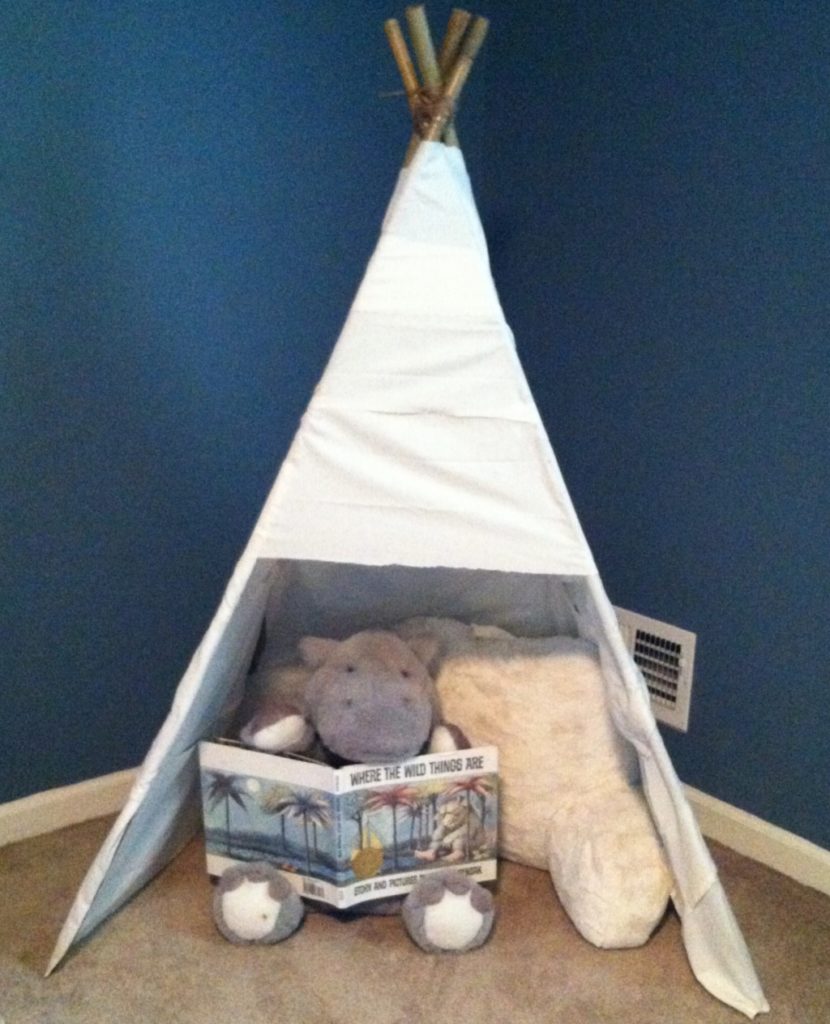
I saw all these cute little teepees for upwards of $100, so I did a little research and purchased materials to make my own. I purchased all materials (beige flat sheet, bamboo garden stakes, twine) for less than $15 at Walmart, and I constructed in an afternoon with a hot glue gun. The materials are all lightweight on purpose. It’s a fun nook for him to crawl in, but no danger of injuries if my little destructive, I-have-to-tear-everything-down, baby knocks it over.
2. Wait for the right purchase.
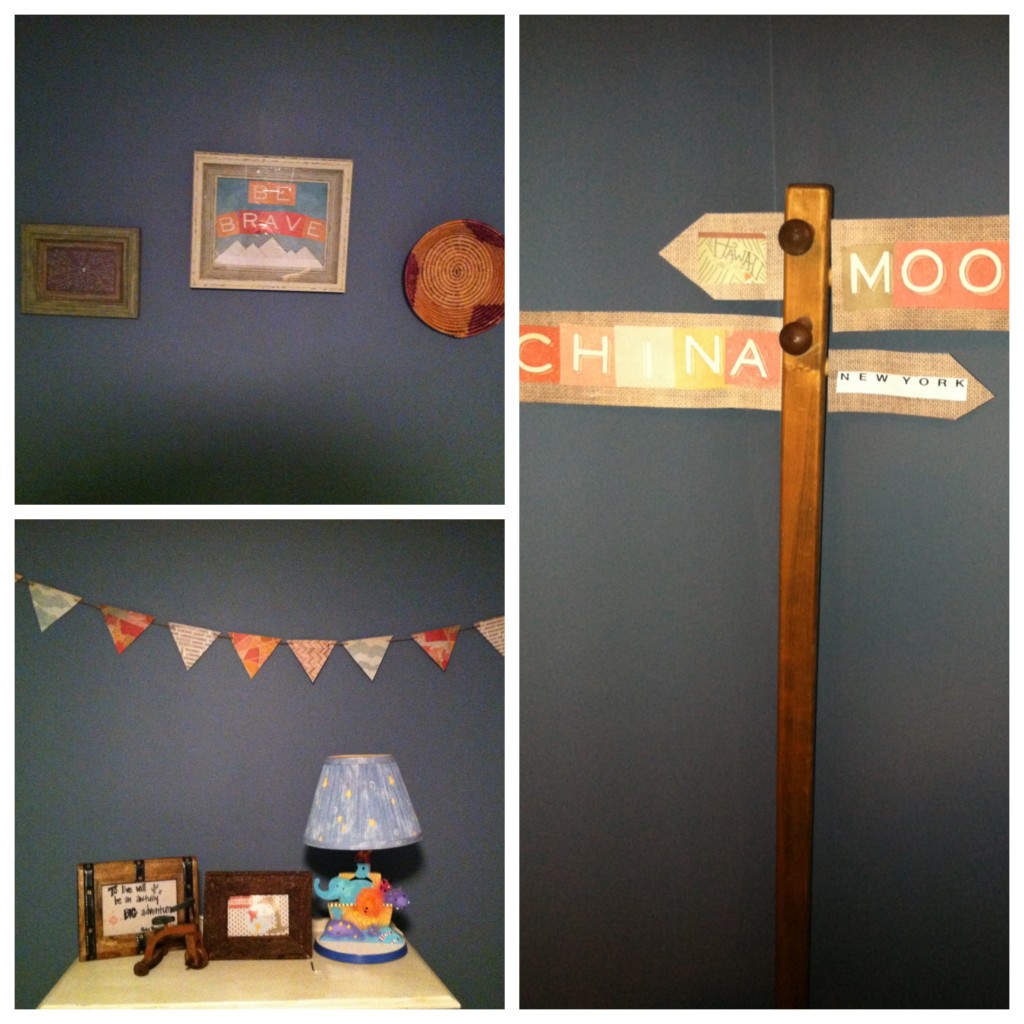
I wanted so badly to hang little decorations on the walls as soon as the paint was dry, but I knew I needed the right things. I found a lot of décor, but I couldn’t justify spending $100 for three framed theme-related decorations. I happened upon a map/travel/adventure book of scrapbook paper, and voila! I just needed some inexpensive frames in varying sizes (also from Tuesday Morning), a little glue, and a little creativity to make all these decorations.
3. Know what you want, and check the discount stores first.
Marshalls and T.J. Maxx were my go-tos. My last purchase was a little rug. I wanted something a little funky, and my online searches were not promising. I checked Marshalls and T.J. Maxx, and I checked them more than once before finally coming across that little pop of color that I was after.
4. Think outside the box.
My vision was a giant framed map that would be the focal point of the room. Giant, framed maps are crazy expensive. I found one on Amazon ($40ish with Amazon Prime and free shipping), and made a frame out of cardboard. I found wooden contact paper to wrap around the cardboard. Genius! Granted, the contact paper is shiny, and when you get close it is very obvious that it isn’t real wood, but do you really think the woman who tells people that her blouse cost $4 at Target cares about that? Plus, it isn’t heavy on the wall and didn’t require a huge amount of hardware to mount and then later dismount when he outgrows this theme I chose for him. Total cost for the framed map? $50, and only because I splurged on the National Geographic map.
5. Use what you have.
That same awesome grandmother I told you about earlier? She had these incredible vintage suitcases I was able to use for storage, and a dear friend gave me a very sturdy rocking chair. His dresser is a hand-me-down from big sister. The crib we purchased new.
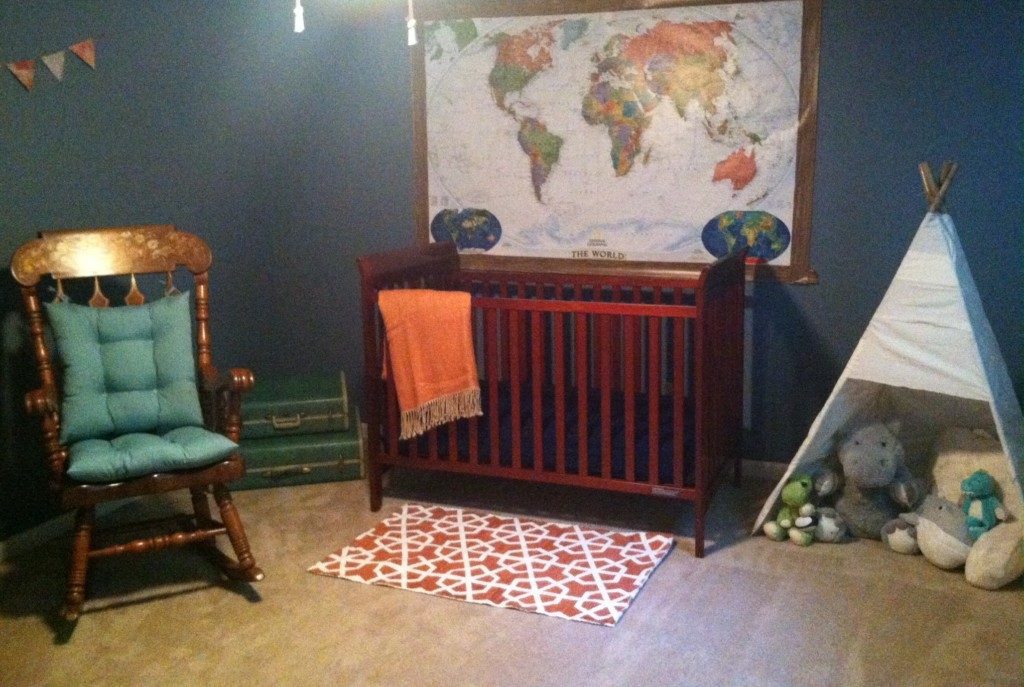
And this is the final product! The best room in the house for sure. Still Pinterest-worthy IMHO, and without absolutely breaking the bank. A little creative planning goes a long way!


❤️❤️ your theme! Decorations are super cute! Go Girl!